Published on: 2026-06-05
Updated on: 2026-07-24
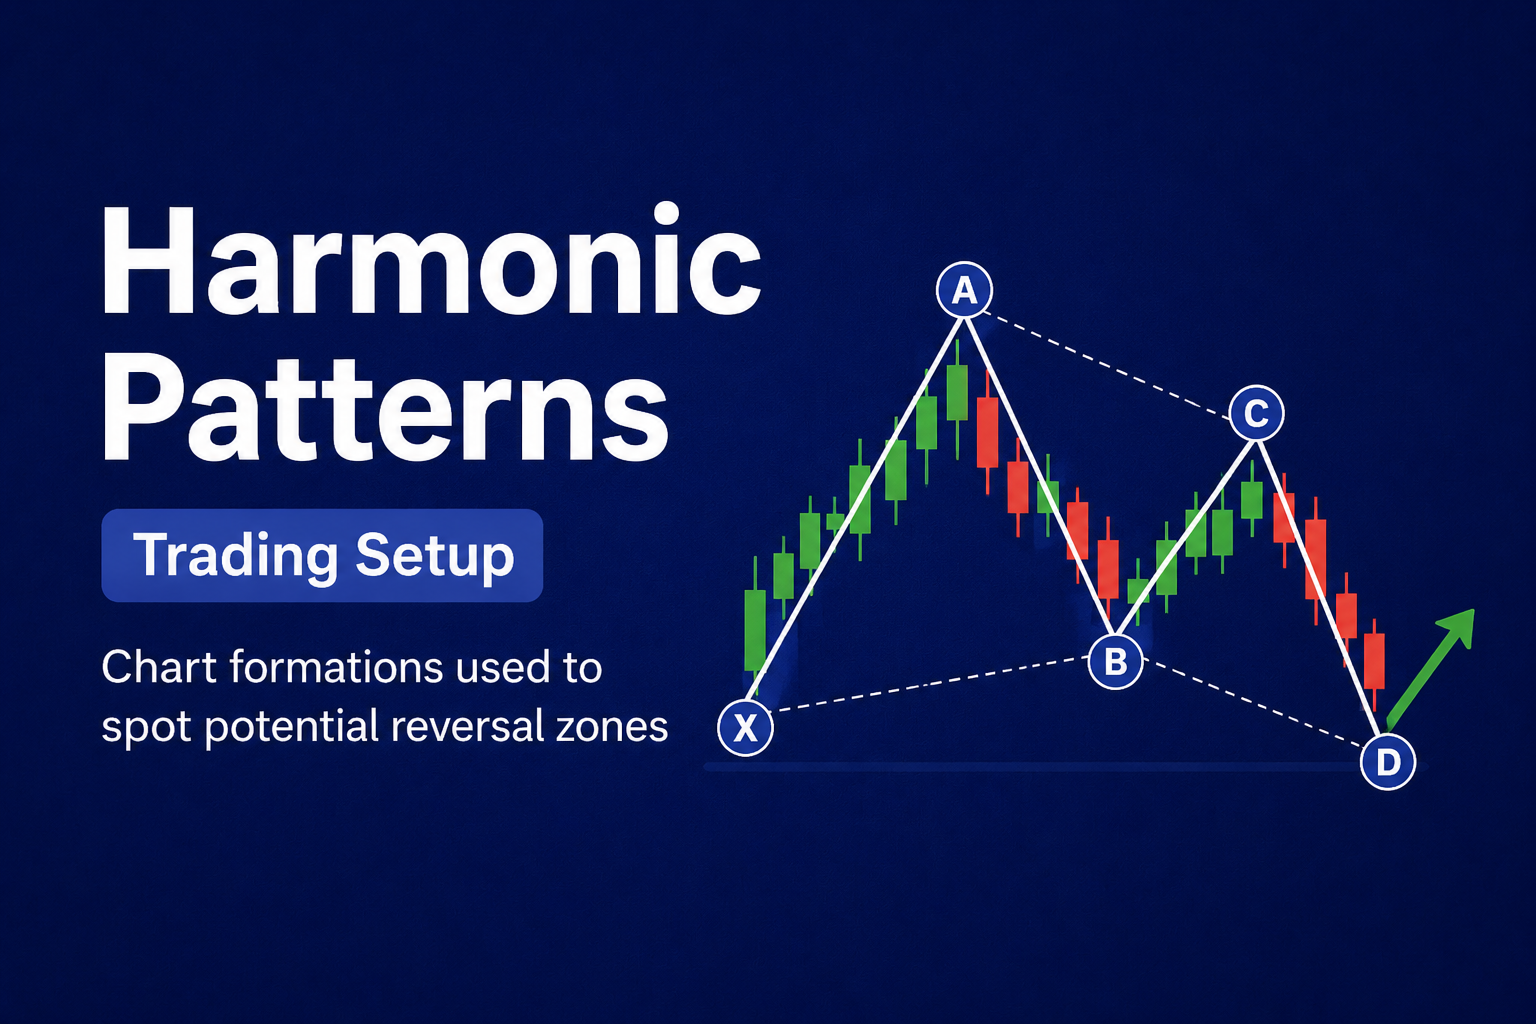
A harmonic pattern turns a price chart into a measurement problem. Instead of judging a shape by eye, a trader checks whether a sequence of price swings fits a specific set of Fibonacci ratios. When enough of those ratios line up at the same price area, that area becomes the Potential Reversal Zone, the point where the pattern expects the market to turn.
Every harmonic pattern is built from the same five points, labelled X, A, B, C and D. What separates one pattern from another is not the shape on the screen. It is the exact retracement and extension level each leg must reach.
Harmonic patterns are five-point (XABCD) price structures where each leg must meet a specific Fibonacci ratio, not just a similar-looking shape.
The ratios 0.786, 0.886 and 1.272 are not arbitrary. They are the square roots of 0.618, 0.786 and 1.618, which is why they recur across every pattern.
Gartley, Bat, Butterfly, Crab, Deep Crab, Cypher and Shark each have a different, defining Fibonacci level at point D.
The Potential Reversal Zone (PRZ) is a cluster of two or more independent Fibonacci levels landing close together, not a single exact price.
The concept began with H.M. Gartley’s 1935 book, but the specific ratios used today were added decades later by Larry Pesavento and Scott Carney.
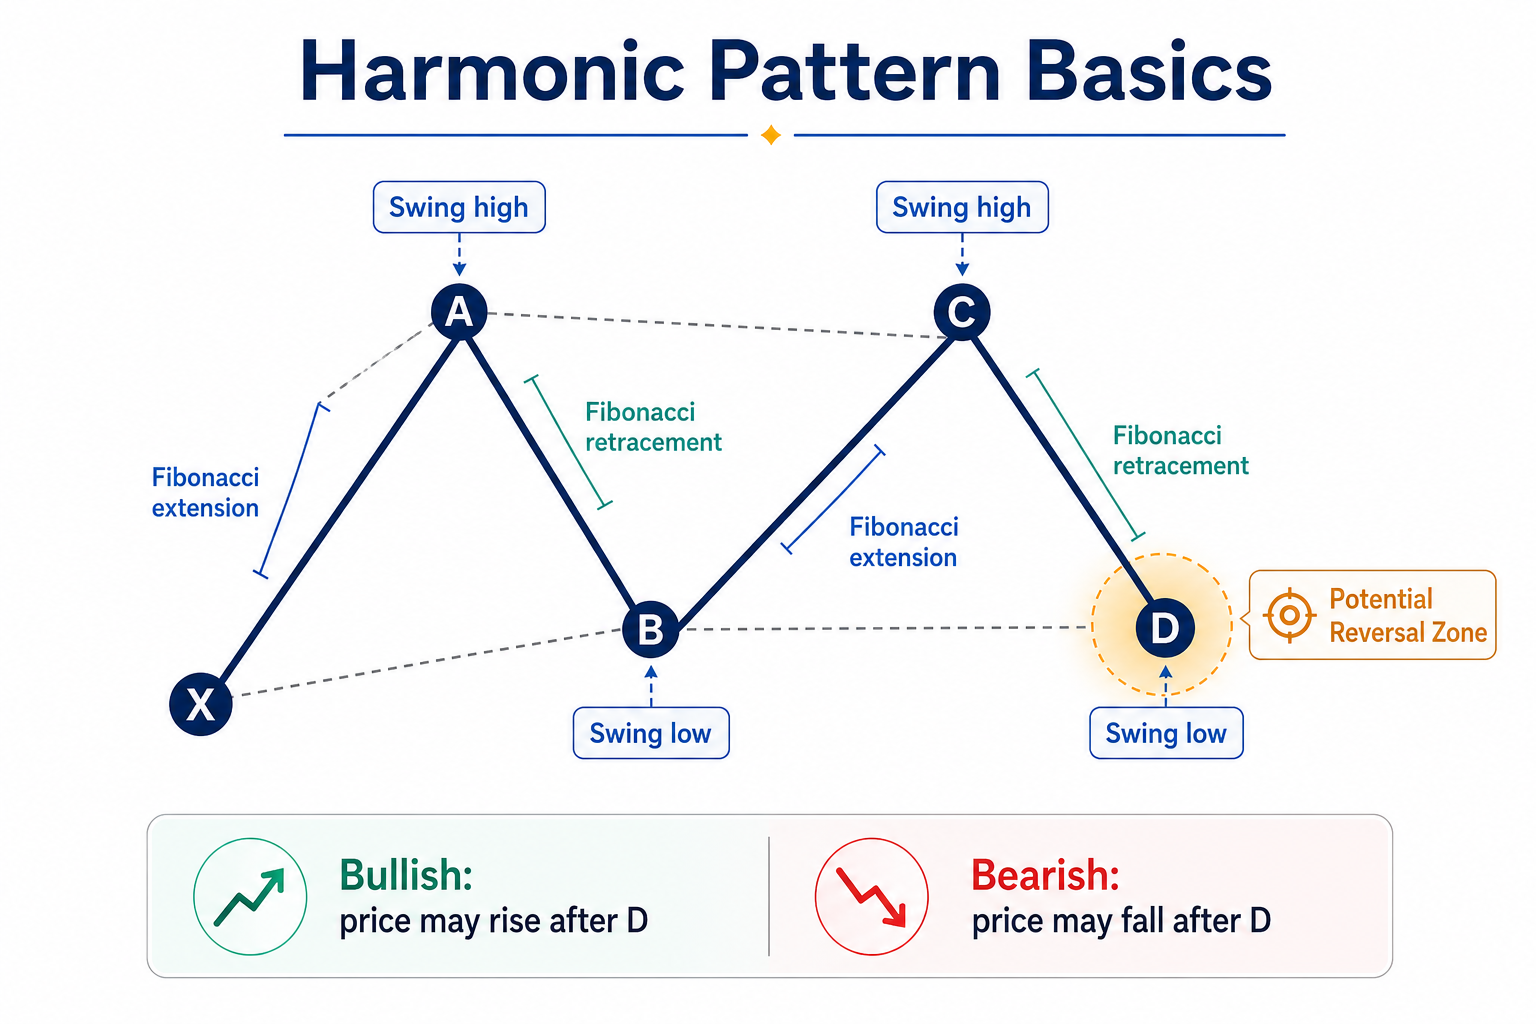
A harmonic pattern is a price structure made of five swing points, X, A, B, C and D, connected by four legs: XA, AB, BC and CD. Each leg must retrace or extend a set percentage of the leg before it. If the measurements fit within an accepted tolerance, the pattern is considered valid, and point D marks the zone where traders watch for a reversal.
The patterns form two mirror shapes. An “M” shape points to a bullish reversal after a decline. A “W” shape points to a bearish reversal after a rally. Point X is the origin of the whole structure. Point A marks the end of the first major swing. Point B is a partial retracement of that swing. Point C is a retracement of the AB leg. Point D is where the pattern completes, and the trade idea is either confirmed or invalidated.
Classic chart patterns such as double tops, head and shoulders, or triangles are read mainly by shape: the outline on the chart, trendlines, and where the price breaks out. A chart pattern education approach like this is fast to learn but leaves a lot of room for personal interpretation.
Harmonic patterns work the other way around. The shape matters less than the exact Fibonacci ratio between each pair of points. Two patterns can look almost identical on a chart and still be different patterns, or invalid ones, depending on where B, C and D actually measured out.
This makes harmonic patterns more precise but also more demanding: a trader needs a Fibonacci tool and a steady hand at marking swing points, not just a good eye for shapes. For the broader toolkit these methods sit inside, see this overview of technical analysis.
Every harmonic pattern draws from the same small set of ratios: 0.382, 0.50, 0.618, 0.707, 0.786, 0.886, 1.13, 1.272, 1.618, 2.0, 2.24, 2.618 and 3.618. Most of these come directly from the Fibonacci sequence, where dividing one number by the next produces 0.618, and dividing a number by the one two places earlier produces 1.618.
The less familiar ratios are not random additions. They are mathematically derived from 0.618:
0.786 is the square root of 0.618.
0.886 is the square root of 0.786, which makes it the fourth root of 0.618.
1.272 is the square root of 1.618.
0.382 is 0.618 squared, which is also 1 minus 0.618.
This is why the same handful of numbers keeps appearing across Gartley, Bat, Butterfly, Crab and the other patterns. Every one of them is a variation on the same base ratio, projected through a square root or a square. For a closer look at how these levels are calculated on a single price swing, see this guide to Fibonacci retracement.
AB=CD is the simplest harmonic structure and the building block for every other pattern on this list. It uses only four points, A, B, C and D, and two legs of roughly equal length.
The rule works like this. Point C retraces the AB leg by somewhere between 0.382 and 0.886, with 0.618 or 0.786 considered the cleanest fit. The CD leg then extends from C in the same direction as AB. The two levels pair up: a 0.618 retracement at C typically pairs with a 1.618 extension to D, while a 0.786 retracement at C typically pairs with a 1.272 extension to D.
In the ideal version of the pattern, the CD leg ends up equal in length to the AB leg, which is where the name comes from. Because it only has four points, AB=CD often appears as a smaller structure inside a larger Gartley, Bat or Butterfly. A separate guide covers this progression in more detail: trading harmonic patterns from AB=CD to the butterfly.
Each of the patterns below uses the same five-point XABCD structure. The XABCD framework is what makes them measurable and comparable, even though the resulting reversal zones sit at very different levels.
Pattern |
B (retraces XA) |
C (retraces AB) |
D (defining level) |
CD relative to prior leg |
|---|---|---|---|---|
Gartley |
0.618 |
0.382 to 0.886 |
0.786 of XA |
1.272 to 1.618 of AB |
Bat |
0.382 to 0.50 |
0.382 to 0.886 |
0.886 of XA |
1.618 to 2.618 of AB |
Butterfly |
0.786 |
0.382 to 0.886 |
1.272 to 1.618 of XA (beyond X) |
1.618 to 2.24 of AB |
Crab |
0.382 to 0.618 |
0.382 to 0.886 |
1.618 of XA |
2.24 to 3.618 of BC |
Deep Crab |
0.886 |
0.382 to 0.886 |
1.618 of XA |
2.24 to 3.618 of BC |
Cypher |
0.382 to 0.618 |
1.272 to 1.414 of XA (beyond A) |
0.786 of XC |
not applicable |
Shark |
not applicable |
1.13 to 1.618 |
0.886 to 1.13 of the OX leg |
1.618 to 2.24 |
The Gartley is the original harmonic pattern, and still the one most traders learn first. Point B sits at a 0.618 retracement of XA, and point D sits at a 0.786 retracement of the same leg. That 0.786 level is the defining feature: if D lands anywhere else, it is not a Gartley.
The pattern tends to produce a tighter reversal zone than most other harmonics, which gives it a comparatively favourable risk-to-reward setup. A full breakdown of how to spot and trade it is available in this Gartley pattern guide.
The Bat looks similar to the Gartley but retraces less at point B, usually 0.382 to 0.50 of XA, and completes deeper at point D, at 0.886 of XA. That 0.886 level is deep enough into the prior move that stop-loss placement can sit relatively close to entry.
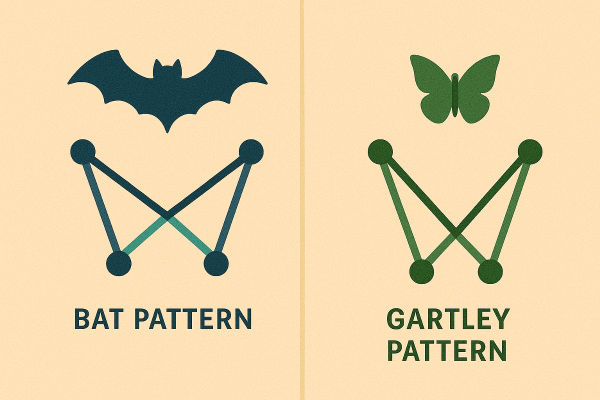
Because the Bat and Gartley are easy to confuse on a chart, this comparison is useful reading: Bat pattern vs Gartley.
The Butterfly is an extension pattern rather than a retracement pattern. Point B retraces 0.786 of XA, and point D projects beyond point X entirely, typically to 1.272 of XA and sometimes as far as 1.618.
This means the reversal zone sits outside the original XA range, which changes how a stop-loss and target are planned compared with a Gartley or Bat. See this butterfly pattern guide for a worked example.
The Crab pattern pushes further than the Gartley, Bat or Butterfly. Point D projects to a full 1.618 extension of XA, the most extreme of the standard patterns, with the CD leg itself often stretching 2.24 to 3.618 times the BC leg.
The Deep Crab is a variant where point B first retraces 0.886 of XA, a much deeper pullback than the standard Crab, before the same 1.618 XA extension defines point D. Both patterns tend to have wider stop-loss requirements than a Gartley or Bat because the reversal zone sits further from the starting point.
The Cypher measures differently from the patterns above it. Point C extends beyond point A, to 1.272 to 1.414 of the XA leg, rather than retracing back inside it. Point D is then measured as a 0.786 retracement of the XC leg, not the XA leg.
This different reference point is what makes the Cypher a separate pattern rather than a variation on the Gartley family. The pattern is credited to technical analyst Darren Oglesbee rather than to Gartley or Carney.
The Shark uses a different point labelling system: O, X, A, B, C instead of X, A, B, C, D. Point B typically extends 1.13 to 1.618 relative to the prior leg, point C extends further to 1.618 to 2.24, and the pattern completes at a retracement of 0.886 to 1.13 of the original OX leg.
Because it relies on extensions rather than retracements for most of its structure, the Shark tends to appear during sharper, more volatile price moves than the other harmonic patterns.
The Potential Reversal Zone, usually shortened to PRZ, is the price area where several independently calculated Fibonacci levels land close together. It is a zone rather than a single number because those levels rarely land on the same price.
Take a hypothetical EUR/USD chart. The 0.786 retracement of the XA leg might sit at 1.0843. The 1.272 extension of the BC leg might independently point to 1.0838. The completion of the AB=CD leg might land at 1.0847. None of those three numbers matches exactly, but they sit within about a dozen pips of each other. That cluster of nearby levels is the PRZ.
The tighter the cluster, the more traders treat the zone as significant, since it means several different measurements taken from different legs are pointing to roughly the same conclusion. A wide, scattered cluster is generally treated as a weaker signal than a tight one.
Trading a harmonic pattern generally follows the same sequence regardless of which pattern is forming:
Mark the X, A, B and C points as they form, using swing highs and swing lows.
Measure each leg against the ratio table above to check which pattern, if any, is developing.
Wait for price to reach the calculated Potential Reversal Zone at point D. The pattern is not tradeable until D actually completes.
Look for a confirmation signal inside the PRZ. Common confirmations include a reversal candlestick, a shift in the Relative Strength Index out of overbought or oversold territory, or a reaction at a prior support or resistance level.
Place a stop-loss beyond the far edge of the PRZ, often just past point X for patterns like the Gartley or Bat, since a move beyond that level invalidates the pattern.
Set targets at Fibonacci retracements of the CD leg, or at the prior swing points B and A, scaling out as each level is reached.
Skipping the confirmation step is one of the more common ways this process goes wrong. A price simply touching the PRZ is not the same as the market actually reversing there.
Harmonic patterns can form on any timeframe, but the swing points tend to be cleaner on the 1-hour, 4-hour and daily charts than on very short timeframes, where price noise makes it harder to draw a reliable XA leg.
The same structure applies across forex pairs, stocks, indices, commodities and cryptocurrencies. What changes between markets is the size of each leg in price terms and how much room a stop-loss needs to allow for normal volatility in that instrument.
Manually marking swing points and checking four separate ratios is slow, so most traders use charting tools to speed up the search. MetaTrader 4, MetaTrader 5 and TradingView all support custom indicators and scanning tools that highlight potential XABCD structures as they form, and EBC’s own analytical tools and indicators can be added to a chart for this purpose.
These scanners are useful for narrowing down which pairs or instruments to look at, but they are not a substitute for checking the ratios directly. Automated tools commonly flag patterns that are a loose fit, since software tolerance settings are often wider than the tolerance a careful trader would accept by hand. Treating a scanner result as a starting point rather than a finished signal avoids acting on patterns that would not pass manual verification.
The most frequent error is forcing a pattern onto a chart that does not actually fit the ratios, simply because the general zigzag shape looks familiar. Close behind that is entering a trade before point D has fully formed, which means the reversal zone itself is still incomplete, and the stop-loss location is not yet defined.
Skipping confirmation is another common issue. Reaching a Fibonacci level is not the same as reversing at it, and a pattern with no supporting signal from candles, momentum or a nearby support or resistance level is weaker than one with two or three forms of confirmation lining up. Misreading swing points is a related problem: choosing the wrong high or low for point X throws off every ratio that follows.
Trading a harmonic pattern against a strong prevailing trend on a higher timeframe tends to reduce its success rate, since the reversal has to overcome that broader pressure. Placing a stop-loss too close to the PRZ is also common, since normal volatility inside the zone can trigger an exit before the reversal has a chance to develop.
Because a harmonic pattern gives a specific invalidation point, usually just beyond point X, risk on these trades can be defined before entry rather than adjusted afterwards. Position size can then be set so that a stop-loss at that level represents a fixed, predetermined amount of risk, in line with the position-sizing approach covered in this guide to risk management.
Targets are commonly staged rather than set as a single exit: a first target near point C or the 0.382 retracement of the CD leg, a second near point A, and a final target at the 0.618 retracement of CD. Scaling out at each stage reduces exposure to a reversal that stalls partway rather than completing in full.
Harmonic patterns are precise in how they are measured, but that precision does not guarantee a reversal. They work best when the ratios are measured correctly, and a candlestick signal, a momentum indicator, or a nearby support or resistance level confirms the completed pattern.
No single pattern has independently verified evidence showing it outperforms the others. The Gartley and Bat are the two patterns most traders find easiest to identify, since their reversal zones sit closer to the starting point X than the wider zones of the Crab or Butterfly.
Harmonic patterns are more demanding than basic chart patterns because they require accurate Fibonacci measurement across four separate legs. Traders new to charting generally find it easier to start with swing highs and lows, support and resistance, and simpler chart patterns before working with harmonic setups.
Yes. The XABCD structure applies the same way across forex, stocks, indices, commodities and cryptocurrencies. What changes between markets is the size of each price leg and how much room a stop-loss needs for that instrument’s typical volatility.
Harmonic patterns can technically form on any timeframe, but swing points are generally cleaner on the 1-hour chart and above. Very short timeframes tend to produce more false or borderline patterns because normal price noise distorts the swing measurements.
No, but most traders use one. MetaTrader 4, MetaTrader 5 and TradingView all offer indicators and scanners that can highlight potential XABCD structures as they develop, which speeds up the search across multiple charts. These tools narrow down candidates; the ratios still need to be checked manually before treating a result as a valid pattern.
A harmonic pattern is a measurement tool before it is a trading signal. It tells a trader where on the chart several independent Fibonacci calculations agree, and where the idea would be proven wrong if price moves past that zone. Neither piece of information says what price will actually do next.
Traders who are new to this method typically spend time identifying Gartley and Bat setups on historical charts, without trading them, before risking money on a live pattern. That practice builds the skill that matters most here: measuring the legs correctly, rather than recognising the general shape.